Roromi 417 Posted August 31, 2021 Share Posted August 31, 2021 I know I’ve hinted at this in my other build but I’m making a dedicated thread to all the OZ Mobile Suits I’ll be pumping out here. once again I used the glass file to get the nub marks off. that piece on the leg was partially annoying. I don’t understand why they couldn’t just include it on one of the leg halves…. Not a bad kit! A few loose parts but perfectly suitable. For the face I cut out some foil to put behind the visor. It does really make it pop I think! Ready to fight some Gundams! Or are we? It is the Alliance Space forces color… I went to comparing what I had previously used to paint the MKII. I determined that some colors would work while others wouldn’t. I tried using glue stick glue to attach the small parts onto the skewers rather than trying to figure something out with the clips. It actually worked really well! Was firm enough to paint with and easy enough to take off when done. We primed everything first of course. it may be called “royal blue” but it’ll always be Titan’s blue to me! This was the tricky part… my normal blue was far too dark to use. I had to lighten it up. When all was said and done I ended up using 3 parts white, 1 part blue, 1 part red, and equal parts (if not more) thinner (alcohol). It’s not perfect but I think it’s a pretty handsome blue that came out. I don’t think it’s too far off the mark… I think the OZ space forces would be proud! What do you think? Up next is a pair of twins. I plan on going more unconventional with them. Stay tuned! 2 Quote Link to comment Share on other sites More sharing options...
Roromi 417 Posted November 16, 2021 Author Share Posted November 16, 2021 I have been dragging my feet on getting back into with the twins but here I am at last tackling them on. Now I’ll admit that the Vayeate is not my favorite of the two. I feel like the beam cannon was far too simple of a gimmick and that they could have done more to make it shine out, especially when the cannon was eclipsed by the performance of the Wing Zero’s buster rifle. But I digress. The Vayeate is to be my test bed for the set of techniques I want to try out on these two kits. Awhile ago I saw a post on reddit where someone had sanded all their parts literally with sand. This process fascinated me greatly because in theory it would cut down on a lot of the time I spend sanding each piece down. This would mean all I would have to do is trim and “polish” off the nub marks then proceed. The method was simple. I would cut out all the pieces for the model (I decided to separate them by runner I didn’t want to get too chaotic). I would then put the cut out pieces and place them in a jar with some sand. It was at this point I decided that I would reuse the same sand from now on, just in case I were to loose any parts. I also decided that I would avoid doing this with any excessively small parts as well. I went on a trip to the local goodwill store to get some second hand jars and utensils that I thought would help me sift through the sand after I was done “shake n baking” the parts. What I ended up ultimately using was 3 different jars (I could have easily done it with just 2 but I wanted the ease of separating parts). Ideally I would have wanted a mesh screen to sift but I made due with what I had. It took some trial and error but I settling on a method of punching big enough holes on the lid of one jar (effectively making a giant salt and pepper shaker) and holding that business end down into the opening of a slightly bigger jar. The sand would slowly pour out but when I mixed that with shaking it would both sift the sand out of the jar and sand the parts that I wanted to get treated. After I sifted the sand out I would then switch the lid for one that didn’t have any holes then do a bath with dish soap and water. I’d rinse it out a couple times to get rid of the soap. Then I would do another bath with rubbing alcohol. I used this pencil holder as a type of strainer for the water baths then let everything dry. The results were fairly astounding. The chest piece was one that I had hand sanded prior to learning this technique, while the leg armor was done with the “shake n bake” method. Fairly comparable and the effort require was worth the trade off in my opinion. Once I prime and paint it will be looking pretty sharp! Now I have all the parts for the Vayeate ready to be assembled. Once I put it together I’m hoping to to add some customizations to the unit that will make it shine a bit more. Stay tuned! 1 Quote Link to comment Share on other sites More sharing options...
Roromi 417 Posted May 25, 2022 Author Share Posted May 25, 2022 Boy do I need to update this thread! So a lot has happened since the sanding of the Vayeate! I’ll try to remain relatively in order of my recounting. The paint job for the Vayeate was relatively successful. I must admit the ball joints and “light blue” sections ended up being darker than I intended but I still like the metallic candy finish compared to the baby blue look. One of my biggest complaints about the design of the Vayeate was the simplicity of the beam cannon. So I asked myself with my build of the kit, “What role will this weapon have?” Two thoughts came to mind, one being that the beam cannon should act more like a sniper since the Mercurius would be close quarters. The only problem with this is that converting the existing kit to resembled something more rifle-ish would either be too long or too ambitious to try. The next conclusion i got to was that well maybe it doesn’t have to be that extreme end of the spectrum. If we look at the Mercurius it has a beam pistol on top of its crash shield. What if the Vayeate would act as more of an “enforcer” type role. Something to barge in closer and unleash utter detestation? My conclusion is the “beam shotgun” basically I used Pla plate to make a casing to house the original beam cannon. It took some trial and error but I’m pretty happy with how it turned out. What do you guys think? With the Vayeate largely completed I decided it was time to tackle the Mercurius. Much the process was the same as before. Of course the changes I made to the twin begged me to consider what other changes I could do the Mercurius to “update” the look. Overall I like the design of Mercurius better, I feel like its more balanced between its’ defensers and pistol it has some options beyond the crash shield. Then I got to thinking about the shield itself. I loved the episode where it stands toe to toe with Wing Zero and it got me thinking that perhaps the suit could stand to be more “elegant” since it’s a melee fighter. For me when I see the words “elegant” and “Fighter” together I naturally think of a rapier. Lucky for me I had my older “per PBandai” kits of the twins so I was free to butcher their parts as I see fit. I took the old crash shield and decided to try downsizing it some to seem more sleek than the original. I feel like the final result could be somewhere between “shield” and “Rapier” perhaps? As for the painting of this kit, I feel like red is my gunpla spirit color since I seem to be doing pretty well with it. I preshaded with black and used a flat red for the majority of the pieces. I think between the pre shading and the clash of flat colors with metallic candy coats made this kit work just a bit better than the twin. Frankly I still can’t get over how well this paint job turned out! It’s this kind of work that gets me pumped for working on Epyon in the near future! And so we have the twins relatively ready to go! I decided to add a sort of “blast shield” on the Vayeate’s shoulder, I feel like it added more to the “enforcer” type of role I was envisioning. I also added additional platting on the knee caps of both units. I decided to pain the inside thrusters on the leg armor as well to match the other thrusters too. I’ll try to get a photo shoot with these guys soon! Thanks again and keep an eye out for the migratory birds that will soon be coming by! 1 Quote Link to comment Share on other sites More sharing options...
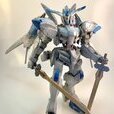
Roromi 417 Posted June 5, 2023 Author Share Posted June 5, 2023 The goose is loose! I dragged my feet too long on all of this! Here’s some sweet shots of all three! Quote Link to comment Share on other sites More sharing options...


Recommended Posts
Join the conversation
You can post now and register later. If you have an account, sign in now to post with your account.